

Refinishing Wooden Floors: Tips to Make Them Look Brand New
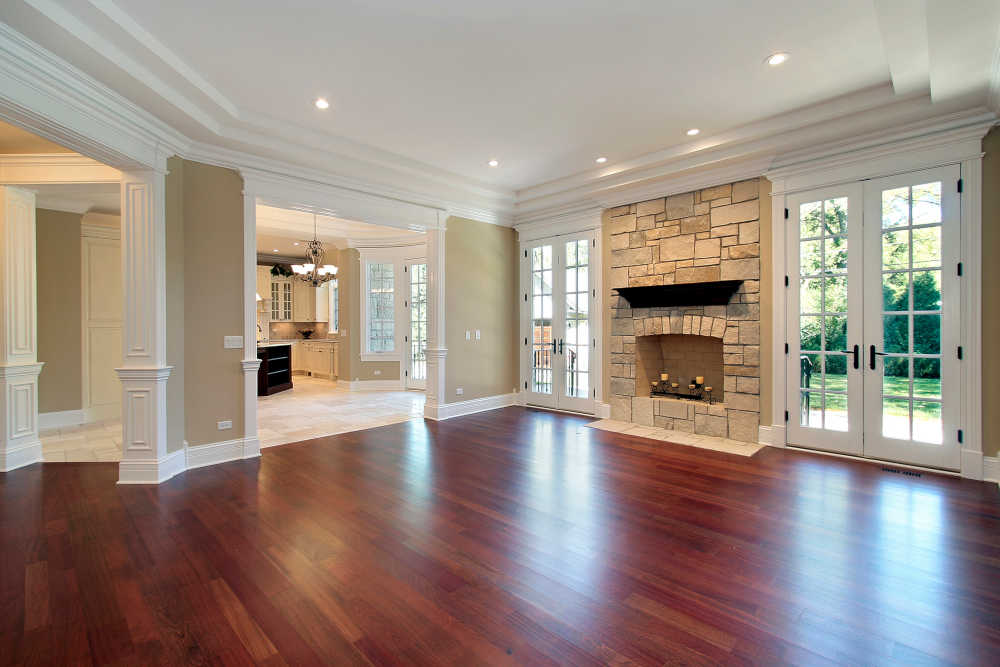
Wooden floors bring timeless elegance and warmth to any space. Eventually, common use can weaken the shine, make little scratches or change their color. If your floors are starting to show their age, don’t rush to replace them just yet—refinishing is a smart, cost-effective solution that can make your wooden floors look brand new.
In this blog, we’ll share expert tips and step-by-step advice on how to refinish your wooden floors and restore their original beauty without breaking the bank.
Why Refinish Wooden Floors Instead of Replace?
There are several reasons why refinishing tends to be smarter than replacing your device.
- Cost-Effective: Refinishing costs significantly less than installing new wooden floors.
- Refinishing Permits the Beauty of Your Original Wood to Stay Intact: If you refinish hardwood, you can hold on to the naturally beautiful wood that is already part of the design.
- Increases Property Value: Restored wooden floors improve the overall appearance of your home, boosting resale value.
Now, let’s explore how to refinish wooden floors step-by-step.
Step 1: Assess the Condition of Your Wooden Floors
Before starting any refinishing project, determine whether your wooden floors are suitable for it. Floors with serious damage such as gouges, breakage or water marks could be fixed more effectively with major treatment instead of surface changes alone.
Key signs your floors are good candidates for refinishing:
- Minor surface scratches
- Dull or worn-out finish
- No major warping or soft spots
Tip: If your wooden floors have already been refinished several times, check the thickness of the wood. Most floors can only be sanded a few times before their integrity is affected.
Step 2: Assemble What You Need
You need to prepare yourself well in advance. For this tutorial, you will need:
- Floor sander (drum or orbital)
- Sandpaper (coarse, medium, and fine grit)
- A good brush, vacuum cleaner and tack cloth
- Wood filler (optional)
- Stain (if desired)
- Elastic or water sealants
- These days, either a paint roller, brush or lambswool applicator can be used.
Having the right tools ensures your wooden floors are refinished evenly and professionally.
Step 3: Sanding the Wooden Floors
Sanding takes away the old topcoat and helps clear up any scratches. First use coarse sandpaper, then, as you keep going, use sandpaper with finer grit.
Things to keep in mind for good sanding:
- Whenever you are sanding, move along the grain of the wood.
- Don’t press too hard or go too fast to avoid leaving depressions.
- For sanding small spots and corners, choose an edge sander.
After sanding, vacuum the spot and wipe it again with a tack cloth to remove dust. This ensures your new finish adheres well and gives your wooden floors a flawless look.
Step 4: Apply Stain (Optional)
If you want to change the color of your wooden floors, now is the time to apply a wood stain. Pick a hue that goes well with your home’s decor.
Advice for handling a stain:
- Rub the wax onto your fabric using either a cloth or an applicator pad.
- Clear off excess stain so it doesn’t leave marks.
- Allow it to dry completely (check manufacturer’s instructions).
This step can dramatically transform the appearance of your wooden floors, giving them a richer and more modern tone.
Step 5: Finish for Protection and Shine
Once the stain is dry, apply a clear finish to protect your wooden floors and enhance their shine. Choose between oil-based polyurethane (durable with a warm glow) or water-based polyurethane (faster drying and lower odor).
Application tips:
- Apply in thin, even coats.
- Let each coat dry completely before applying the next.
- Lightly sand between coats for a smoother finish.
Apply 2–3 coats for best results. A good finish will protect your wooden floors from future wear and tear while restoring that showroom shine.
Step 6: Allow Proper Drying Time
After the final coat, give your wooden floors ample time to cure. Avoid walking on them or placing furniture for at least 24–72 hours, depending on the product used.
Place felt pads under furniture legs to avoid scratching once the floors are ready to use.
Maintenance Tips to Keep Wooden Floors Looking New
Once refinished, you’ll want to maintain that like-new look. Here’s how:
- Clean regularly with a soft broom or vacuum.
- Use a damp (not wet) mop and wood floor cleaner.
- Place rugs or mats in high-traffic areas.
- Avoid dragging furniture across the floor.
Proper care ensures your refinished wooden floors retain their beauty for years to come.
When to Hire a Professional
Refinishing wooden floors is a big DIY project that requires time, effort, and some skill. If you aren’t sure how to use sanding tools or apply finish evenly, a skilled professional can take care of it for you. Although backyard landscaping is often pricer at the start, the results can stay beautiful for a long time.
Conclusion
Refinishing wooden floors is one of the most rewarding home improvement projects you can undertake. It helps your floors to look radiant again, while also increasing their useful life and the value of your home.
With the right tools, a bit of patience, and attention to detail, you can transform tired, worn-out floors into a stunning focal point once again. So before you consider replacing your floors, ask yourself: have I given my wooden floors the chance to shine like new?
Contact Panipat handloom emporium for the best wooden flooring
Call us on +91-9899073000, +91-8750875888


